23 Fence Painting Tips: Get the Fence You Deserve

You’re going to paint your fence, and you want the security that you’re going to do the best job possible. But how?
There are plenty of reasons fences don’t come out looking as you want them to, and we’re fortunate enough to know what they are. Read these 23 tips for painting fence panels to get the inside information.
1. Always Paint in Dry Weather
Paint and rain don’t mix well, so we’d advise against painting your fence in wet weather. Why? Rain can cause the paint to streak; rain can also reduce the life of your paint, meaning you could be painting again sooner than you think!
Further Reading: How to Paint a Fence After Rain
2. Avoid Hot Days
Direct sunlight and humid temperatures can cause the paint to dry too quickly and can damage the paint’s protective qualities. Also, you don’t want to dehydrate yourself and become ill, so aim for a temperate day.
3. Check the Weather
It’s simple, but something that people always forget. The weather reports aren’t always predictable, but they’ll help you determine whether to paint or not. If you have access to an app, you can usually check the weather for at least a week in advance, and you can set up weather alerts on some apps, so you don’t forget.
4. Buy High-Quality Paint
Sure, you can go for the cheapest option - but is it going to give your fence a look you want? Buying low-quality paint means you’ll have to apply more coats and it doesn’t last as long. High-quality paint is at less risk of peeling, cracking, and blistering, scuffing and fingerprints, mildew and mould, fading and chalking.
5. Cut and Rake the Grass
Wind can blow any lawn debris flying into the fence as you paint it. Don’t spend hours going through your lawn with a fine tooth comb, but do mow and rake it so you can minimise the risk of anything sticking to the fence.
6. Trim Your Shrubbery
Bushes and trees can get in the way when you’re painting, so it’s best to trim them. They can also become damaged, which is gutting if you’ve spent a lot of your time growing and maintaining them. Or they could be your neighbours!
7. Wash Before You Paint
If your fence is dirty, you could wash it. There are a couple of ways you can do this: do it the old fashioned way and grab a sponge and some warm water, or use a pressure washer. If the fence isn’t in bad condition, take the former option and if it’s particularly dirty take the latter option.
8. Sand Before You Paint
If you’ve got a new, untreated fence give it a rub with some medium sandpaper, it’ll help the paint stick to the surface, If you’ve got an old fence, sand any excess paint, dust and particles which will make it easier to paint.

9. Tell Your Neighbours
You don’t want to inconvenience anyone by painting your fence, so it’s best to let people know when you’re thinking of doing it. If they’ve got dogs or kids that play out in the garden, they might want to keep them away from the fumes or make your life easier by keeping them indoors.
10. Wear Old Clothes
Don’t wear your brand new, white £60 Adidas trainers; you’re asking for trouble. Wear some wellies or old trainers if you can, and clothing you don’t mind getting paint on. You could always use some latex or garden gloves to prevent your hands from being dyed.
11. Ask Someone to Watch the Kids/Pets
If you’ve got hyperactive or escape prone kids and pets - it’s probably best to get someone to look after them. They could knock paint all over your garden, inhale the fumes or worse, ingest the paint.
12. Wear a Protective Mask
Wearing a mask is often not considered a necessity, but we think everyone should wear one. Masks prevent any harmful particles being inhaled. If you’re sanding, washing and painting you could inhale quite a lot of harmful substances in that period.

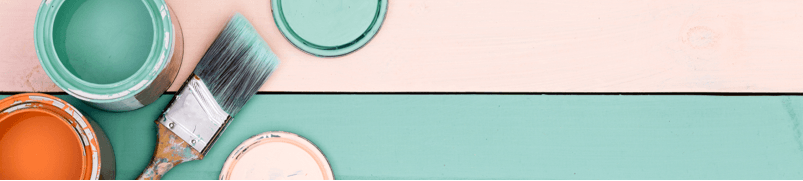
13. Use the Right Brush
If you’re using a brush to paint your fence, ensure you get the right one. For example, picking up a paintbrush that you use with enamel paint may not work on your fence.
14. Avoid Paint Rollers
Paint rollers aren’t practical when painting a fence, because most fences aren’t flat surfaces, so the roller won’t cover specific areas and you’ll struggle to get any momentum. If you don’t want to use a brush you could explore buying or renting a paint sprayer.
15. Press Tape
There’s nothing worse than finishing a paint job to find out the paint has bled through the tape and onto another surface. Before you start painting, press the tape down with a putty knife.
16. Cut Tape Loose
Once the paint has dried, use a blade to cut the tape from the wall rather than peeling it off. Peeling may cause you to take paint away from the fence, and doing it while the fence is wet or gummy makes a mess.

17. Paint One Panel at a Time
This may seem overly logical, but it can be tempting to do several panels at once. You’ll ruin the finish of the paint, plus it’s a logistical nightmare, and you might have to manoeuvre your equipment around.
18. Bag Up Your Brushes
It’s unlikely you’ll finish painting on the first day, so get a plastic bag ready for your brushes. That way, they won’t dry out, and you won’t have to waste money on new brushes. Wash them if you have time, that’ll remove any excess paint.
19. Use Drop Cloths or Plastic Sheets
You’ll want to protect your garden and your neighbour's garden, so lay drop cloths and plastic sheets under the fence panel. You’ll also want to protect plants, shrubs and trees, so use a cloth or sheet to cover them up.
20. Apply a Primer
While primer may seem like an unnecessary expense, it’s worth it. Primer helps paint stick to the surface of your fence, as well as increasing its durability and providing extra protection. There are different types of primer, so be sure to ask which one is suitable.

21. Maintain Your Fence
Once you’ve painted your fence, ensure you maintain it. Apply a wood fence cleaner to keep it looking pristine, and a polyurethane sealant to protect the wood against bad weather. Further to that, you could add a wood preservative to maintain base posts.
22. Get the Right Paint Colour
Painting a fence pink and yellow might seem like a good idea, but does it complement your surroundings? Look at the colour and material used to build your house to point you in the right direction. For example, if your house is red, you could experiment with chestnut colours to create a pleasant contrast.
23. Create a Shopping List
Before you drop into your local DIY store and start piling everything into your trolley, create a shopping list, so you don’t miss anything. You’ll want to spend most of your time painting, not picking up things you forgot.
Prepare Your Fence
If you think you’re ready to paint - read our blog on how to prepare a fence for painting. Preparation is essential when painting a fence, if you get the basics right, you’ll be off to a flying start.